Showing posts with label DIY. Show all posts

Friday, November 11, 2011

Back with GOOD news!

This has been a hard year.  I'm totally over 2011.  I'm going to re-categorize the days that remain in this exhausting year as "pre-2012."  We wrapped up 2011 (see, I've already transitioned) with a bit more disappointment.  My mom and I missed the 3-Day to be able to be with family after my Grandma Boone passed away.  It was so good to be with family to remember my grandma and learn some little known facts about her life (jitterbug champ!?).  But is was a bummer to miss out on the walk.  However!  We are already registered for next year.  The sweet 3-Day folks let us transfer our registrations and, while I hope that I can raise the full $2300 for 2012, we'll be able to count our 2011 fundraising toward the 2012 walk.

Now, on to the good news.  S and I have been house hunting for a couple of months.  I was not sold on staying in OKC.  Originally I agreed to live here for ONE year and ONE year only.  But I don't exactly have a plan for the end of the one year so we decided it would be okay to plan for 2-3 years and then make a change.  S also got it in his head that rehabbing old houses would be a fun "hobby" so why not start with our own?  We are one phone call away from having a contract on a cute 1919 craftsman house in a historic neighborhood and I am finally doing my happy dance!

I'll share a bit more as we move forward with the process - our HUD home, 203k financed, renovation-tastic project.  Hopefully everything will move forward without a hitch but there's always a possibility that the deal will fall through.  In fact, we thought we had missed out on this property because it was already under contract when we found it.  That deal fell through and we swooped in.  We're learning with these great deals that swooping is really important because lots of investors are waiting in the wings.  We missed out on several other gems because of our failure to swoop.  With this one we are cautiously optimistic.

In the meantime, how about this shot of the dining room, taken from the living room?  Fireplace, built-ins, hardwood floors, vintage wallpaper...I'm in love.

Monday, September 26, 2011

Trend sitter

Not to be confused with a trend setter, a trend sitter is one who sees a trend, likes the trend, but then sits on it for a while to make sure it's sticking around before jumping on the bandwagon right before it goes out of style.

 That is me.  Hi.  It took me two years to embrace capris because I was CONVINCED they wouldn't stick around.  Oops.  And skinny jeans.  And boots.  Are you getting the idea?  Ballet flats however, well, I was all over that.  Remember in the 90s when every shoes you owned had a heel or a giant sole (I'm looking at you Doc Martin sandals).  Far thee well, ugly shoes, until you return on my children's feet and I say "that's what WE wore in high school!"

My current trend sitting involves the zigzag, um, chevron pattern.  Actually, I'm not really that behind, I did make this pillow earlier this year.  I painted the fabric and everything!

But now I am SO trendy because I painted these beauties.

Ooo....ahhhhh...  I know, right?  Gray, yellow, chevron...I'm like every Pinterest pin ever pinned but in real life!

These canvases were from a failed painting project.  They once held my attempt at painting "botanicals" but there was nothing botanical about them.  So they each got covered in white craft paint and sat in our "little living room" for two weeks because I dreaded the next part.

Taping.  I was going to have to tape our the pattern and I really didn't want to.  I get antsy pants when it comes to detail work and it makes me want to jump up and down and scream.  But I used the method and the pattern that I found here and, two reruns of 30 Rock later, they were taped.  And I didn't take pictures because that's kind of boring.
I lightened up my gray paint with some white and paint, paint, paint...they were done!  Now they hang next to the TV and look subtle and pretty. And making the rest of the wall look really bare.

Now, time for a BIG UPDATE.  The toilet paper roll mirror had a makeover.  See if you can tell.


Well, as you probably can't tell from the really dark picture, she got a new coat of paint!  We upgraded from Colonial Red to Apple Red.  Uh-huh, she's sassy now.  And she got another layer of rolls.  For humans this would be a horrible thing, but for a toilet paper roll mirror, it's spectacular!

Alright, I'm off to trend sit on my giant customized subway art with special meaning that only we understand and my yarn wreath.

Wednesday, August 10, 2011

Mirror, mirror...made out of toilet paper rolls

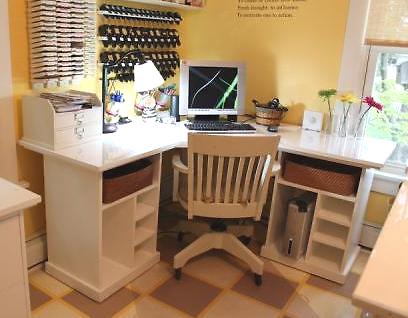
In my new home, aka my parent's house, we have two rooms: our blue bedroom and our yellow living room/the guest bedroom that no longer houses a bed.  Our little yellow living room is crammed with our love seat, a chair, a few bookshelves, Buddy's crate, and our TV.  It's cozy.  We painted it yellow about three weeks ago and I've been trying to figure out how to make it homey without too much effort or special projects since everything is temporary and we didn't unpack most of our belongings.  When it's all finished I'll share more pictures but for now, here's a taste of my current inspiration from Pinterest.


I'm slightly obsessed with that mirror and really wanted it to go over our couch.  I love that it's a) a little bit gaudy, b) red, and c) oval, since most of our yellow room is boxy with lots of 90-degree angles.

So I looked and looked and looked for a mirror that would cost me $10 and look like this.  You might be surprised to learn that I did not find it.  Shocking.  But I did remember something that I pinned a few weeks back.


You know what?  I was right.  It does make an awesome frame for a mirror.  The original tutorial is found here but I'll show you my spin on it.

First, living with five adults and three bathrooms, it only took about 5 hours to accumulate enough toilet paper rolls for the project.  I may have dug through a few trash cans.  I don't remember how many rolls I used, I just kept cutting until I had enough circles.

First, you cut each toilet paper roll into small circles of varying sizes, they don't have to be the same width.  The cardboard gets a bit squished but it's okay, you just smoosh it back into shape.


I got a mirror from Hobby Lobby in the candle/centerpiece section.  It was originally $7.99 but at 50% off I got it for about $4.  Yay!  I started by laying out the toilet paper roll circles around the mirror to get and idea if this was going to work (and it did, whew).  Then a little bit of hot glue between each circle holds the thing together.


Around and around and around until I had three layers.


I fully intended to include the little curly cues like my inspiration wreath but I kind of liked the cleaner look and figured I can add them later if I want to.  Plus, I was out of toilet paper rolls.

Then I just lifted the whole thing off (it wasn't attached to the mirror yet!) and took it outside to spray paint it "Colonial Red."


After it looked like something horrible had happened in the backyard or like Dexter had shown up and the first side was dry, I turned the whole thing over and spray painted the other side.  Toilet paper rolls really suck up spray paint!

To hang the mirror I used 3M picture hangers, the kind of the clicking plastic things.  I thought I took a picture but....I can't seem to find it.  I stuck three on the back of the mirror and followed the instructions to hang.

After everything dried, I used a little bit of hot glue at a few points around the new frame to attach to the mirror and then *CLICK* attached it to the wall.


Ta-da!  It's a bit smaller than I thought it would be and since the toilet paper rolls are really only chunky from the side it doesn't have the red showpiece effect that I was hoping for but it was only $4 + $3.77 for spray paint so if I do find that awesome oval mirror, no biggie.  In the meantime, it's adding some curve appeal (harhar) to our tiny yellow living room.

I have more things to spray paint for our yellow space but today it's raining so I guess it'll have to wait.

Now that I am fully aware of the abundance of toilet paper rolls, any other suggestions for how these little tubes might enhance our home?

Tuesday, August 2, 2011

Blu-ue room, you saw me standing alone...

Or, The Moody Blues.

Last week if you were walking down the hall to our bedroom, you would see a plain room with plain (pink) walls.


Before that you would have seen an empty room with blue carpet and then you would have seen the demo.


But now you see a beautiful dark blue room with moody blue walls.


I am obsessed with my cozy blue room.  I told S that is feels like a hug.  Who would have thought it would be so comforting to wake up in a dark room?


The small room feels bigger with the rich color and the white curtains and linens look so crisp!

And, bonus, a look back at the pink bathroom.


Eek!  This was right after we moved in.  After adding a black and white rug that my parents brought with them, our white shower curtain, some white towels, and a little bit of art, it looks a bit more glamorous.


We're going to paint the cabinets a glossy lacquered black and add silver hardware to spruce it up until the time comes for my parents to demo that bathroom and make it what they want.  In the meantime, the pink is really growing on me!

Wednesday, July 20, 2011

The place where we live

The place where we live in OKC is the house that my parents own.  It has two parts: one built in the 1960s and one added on in the late 1970s.  The 1960s part is small with fun (but damaged) hardwood floors that we discovered under ugly carpet.  The 1970s section includes a giant living room with the master suite, laundry room, and what used to be a hot tub room before the (flat) roof caved in so now it's a hot tub patio. 

We live in the 1960s part of the house.  We have a bedroom and the "small living room" (bedroom with the couch and TV in it).  Here's a little bit of what we encountered during our first few days in the house.  We have big plans to help my parents update each room!

 the extra room/guest room

 the bedroom after carpet removal

the "small living room" before drapery removal
i'm sure those custom drapes were expensive back in the day

the pink bathoom, we've already helped it a bit

the big living room

the other side of the big living room

i'm obsessed with the wallpaper in the laundry room!


the kitchen needs a lot of love
and an island

goodbye old drapes!  hello white panels!
and the couch and the tv and a chair

and some tables and a bench and some artwork

and some paint samples for the future "small YELLOW living room"!

Wednesday, May 25, 2011

My Current Obsession

I am currently obsessed with Ana White.  This Alaska lady has an entire blog dedicated to putting out easy plans for people to build their own furniture.  How empowering, right?  Get some tools!  Build a table!  And most of the "do-ers" are women, traditionally not the tool-buying, table-building demographic.  She and other guests post plans and then people post their "brag blogs" about what they built and how it turned out and it usually turns our magnificently.

We're getting ready to move into my parent's OKC house for about a year and while we're there we're going to get things fixed up and ready to sell.  One of our projects is an island for the massive kitchen.  We also need to repaint the cabinets (after removing several layers of paint), change out the hardware, replace the nasty old carpet, replace the dishwasher, and perhaps replace the stove and oven.  But after all that...then we want to add an island.  But we won't want to spend a lot of money.  So we can build one!  I popped "kitchen island" into the search bar at ana-white.com and come up with these beauties.


 via


The first one's actually a counter-height craft table, but I think it would make a stupendous island.  We'll paint the island the same color as the cabinets and probably top it with a butcher block countertop from Ikea.

We also will need a desk.  We have an inherited computer desk that works well but is U-G-L-Y and extremely awkward to move.  When we moved to Atlanta I made S promise me that this was the LAST time we would move this desk.  Goodbye ugly desk!

But S will be in grad school and I'll be getting ready for grad school so we need some sort of desk set up.  I know!  Let's build one!  Ana?

via
via

I like the first two because they could be reincarnated as something else someday - a console table, an entry table, etc.  I like the last one because it's beautiful.

But if we build a desk with less storage then we need a place to put everything that we currently store in out ugly desk.  I know!


Don't you love that color?  And the filing cabinet-inspired details?

All together now...

Can we build it?

YES WE CAN!

Monday, May 23, 2011

My creating self

A while back I posted a short list of small projects.  And then I did them!  Well, most of them.  So here's where we stand.
  • a pillow  One here
  • another pillow and here
  • a couple of finished pillows still here
  • some fabric for a pillow (sensing a theme...) yep, still on this one
  • reigniting my love of tolerance for crocheting I'm even working on some "inventory"!
  • a scarf for S It looks like this.  Too bad S doesn't wear scarves.  Oops.
  • some beyond precious crocheted baby things These booties launched several more pairs.
  • spray painting a lamp My old "ancient Greece-inspired" Pier 1 lamp is now blue! More specifically, it's Rustoleum's "Night Tide."  More on that lampshade in a minute.  Do you see that dresser top?  Numero uno on my to-do list after we move into a house with a garage this summer!

  • recovering the lamp shade  Oh, look, we're already to the lamp shade.  So I read about a thousand different blog posts about how the "easiest way to update a lamp is to recover the lampshade with fabric and a hot glue gun!"  It's supposedly super simple and amazing.  These people?  They are liars.  It is not easy and my lampshade looks like poop.  But it's still hanging out on my lamp because it's the only one in the house that looks good on that lamp.  It didn't help that the shade I chose to recover was ancient and cracked and discolored and I chose to cover it with transparent white fabric.  Oh well.


  • a spring wreath I have yet to make one for the outside of the front door, but I was inspired by these pomanders to create this!

 Let's see, I walked by the TV and saw some women making a tray out of a picture frame now my lotion and jewelry and such sit on this.


I also used the flower punch from the wreath project to add some white flowers to some branches I found on a Buddy walk.


And since I had some burlap on hand, I copied this project almost exactly.


Now this pile of goodness is waiting for me!  I have some "commissioned" pillows to make and that dang spring (uh, summer?) wreath that's been waiting for two months to be made.  With only two months left until we move, it seems a little silly to be starting something new, doesn't it?  Spring Summer wreath, you might have to wait.